It's Done. East Candia Engine 1 is offically back in service after more than a year of downtime. For the first time today, the Engine rolled out from the spot she was sitting in and took a trip onto the open road. Granted it was a short trip down the driveway, three point turn to point back the way we came, and back up the driveway, but it was a start.
Parade season is comming fast, and I fully expect to complete the entire parade circuit this year with minimal issues.
Even though the project on the engine work is complete, Engine 1 needs a lot more TLC. We need new floorboards. We need new tires (eventually). We need a bit of electrcal work in the cab done.
Keep checking back, because I'll continue to post things about my little projects, and post pictures of all the parades we make it to this year!
Monday, April 20, 2009

Sunday, April 19, 2009
95% Complete
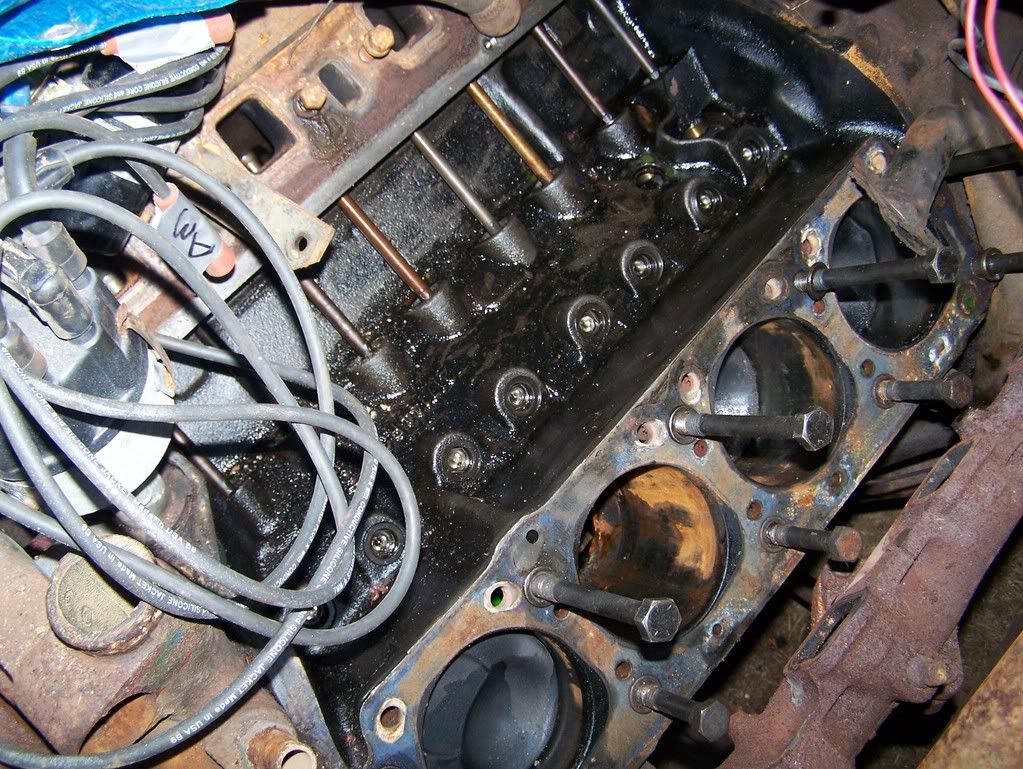
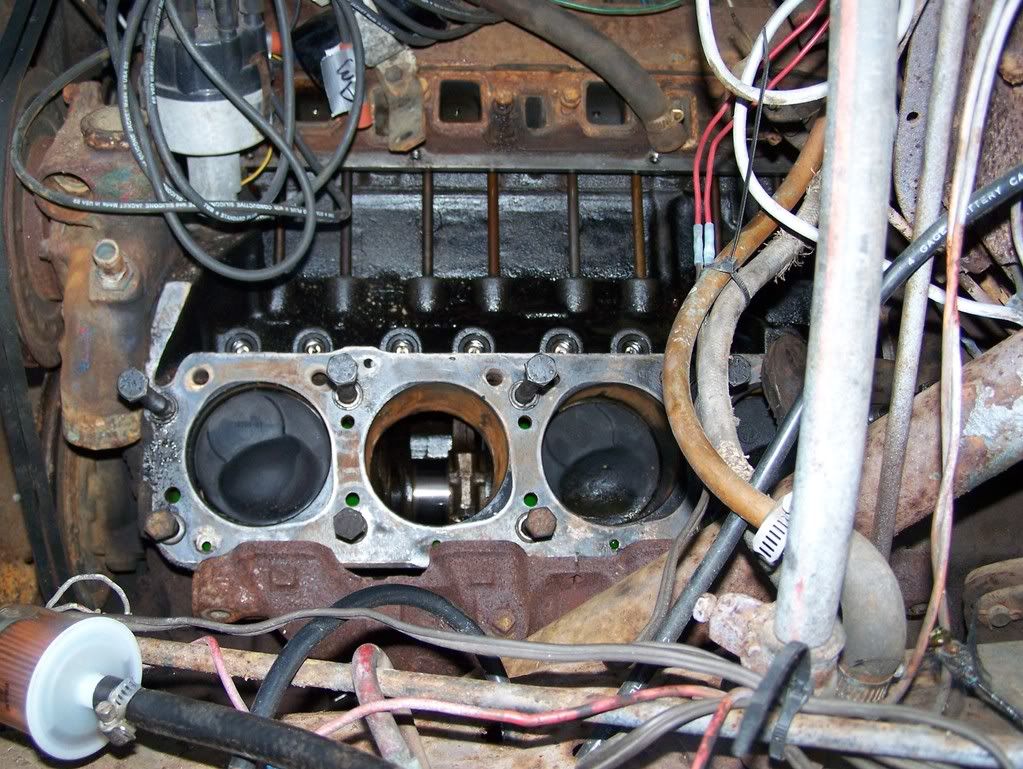
The last four days have been filled with all sorts of engine work fun. After deciding that putting the new engine in would be easier with the heads off as the engine to transmission mounting bolts would be easier to access. I also figured that since I had a set of head gaskets laying around it wouldn't hurt to do the job. So I removed the heads and cleaned out the gunk from cylinders #2 and #8, the ones that got a little wet while the engine was sitting outside. The cylinder walls looked good though!
Thursday, 4/16/2009
My friend Jimmy came over with his wrecker to remove the engine with me. We hooked onto the old block with the tow cable and out the junker came. Then we removed the clutch plates and the flywheel for the new engine. After getting the new engine on the tow cable, we put the flywheel and clutch on, but not without a little bit of a scare with the fit. Apparently the new engine was mated to an automatic transmission (or the manual tranny was different) because there was a 4" spacer on the back of the crankshaft. Fortunately it was held in with just a roll pin and we were able to tap it off with a hammer and some elbow grease. Tragedy averted, the engine was hoisted into the frame and mated with the tranny after a little wiggling. We did have a slight issues as one of the alignment pins stayed in the bell house ear when the old engine came out, so we had to cut the new pin with a hacksaw as we didn't notice until after the tow truck was unhooked. It was easier to just cut it than it was to remove the engine. After that was done, it mated without incident.
Saturday 4/18/2009
We cleaned both the engine block and cylinder head surfaces with a soft die grinder to removed the old rust (thanks to the folks on oldihc.org for the tip) and also did the same to the intake manifold surfaces before putting the manifold back on. The heads went on without a problem, and the intake manifold was a breeze to put on. The exhaust manifolds were a little more difficult, but after some choice words and a few cuts on the hand, they were snug to the engine.
We bolted on the fuel pump next, and then timed the engine to cylinder number eight, without the use of a timing light. All we did was align the timing mark with zero degrees on the compression stroke, picked a post on the distributor cap, and started counting from there. My IHC V-304 rebuild manual that I bought was an excellent resource for this project!
The oil was changed, and a new oil filter was screwed on.
Sunday 4/19/2009
Today was spent putting on the thermostat housing (with a new 160 degree thermostat) which we picked up from Sanel Auto Parts. They didn't have a new gasket available for the housing, so Katherin (my girlfriend) cut a new gasket out of cork using the old one as a guide. The alternator bracket was hooked on and alternator was added. After some head scratching about the alternator and coil wiring, I referred to a diagram I drew that I used to build a new voltage regulator for the truck. (Back in 2007 I had to have the alternator rebuilt, and we discovered the old voltage regulator was bad. The guys at Auto Electric in Brentwood, NH, who also rebuilt the alternator, were able to help me build a replacement from few different pieces.) After everything was hooked up properly, we put the pulleys on the water pump and the crankshaft. The twin V-belts were run, and the carburetor was put onto the manifold. A good battery charge was done as well!
We sprayed a little bit of starting fluid into the carb and closed the choke. After a bit of a crank, the engine sputtered! I sprayed a little more ether, but left the choke open.....and she backfired right out of the carb! There was quite a flame, but I didn't lose my eyebrows. After that lesson, we did it once more. After the engine caught, I forgot that I had the fuel lines connected, and fuel started coming up into the lower filter....I noticed it but figured it wouldn't make it to the second filter before the carb.....boy was I wrong! About 10 seconds after it hit the first filter before the fuel pump, the second filter was full! I told Katherin to shut the engine down as I wasn't ready to have her run on her own...it was simply a test to make sure the truck would even fire!
Tomorrow will be spent putting the radiator in, adding engine coolant, and getting the throttle and choke cables hooked back up. We also have to splice some of the wires back together as I had to cut a few so the engine could get (they ran just above the radiator). After that's done we can spend he rest of the afternoon adjusting the carb for the truck and letting her spend some time running. Maybe she will even sneak a ride onto the road for a test.......
More to follow tomorrow!
Thursday, 4/16/2009
My friend Jimmy came over with his wrecker to remove the engine with me. We hooked onto the old block with the tow cable and out the junker came. Then we removed the clutch plates and the flywheel for the new engine. After getting the new engine on the tow cable, we put the flywheel and clutch on, but not without a little bit of a scare with the fit. Apparently the new engine was mated to an automatic transmission (or the manual tranny was different) because there was a 4" spacer on the back of the crankshaft. Fortunately it was held in with just a roll pin and we were able to tap it off with a hammer and some elbow grease. Tragedy averted, the engine was hoisted into the frame and mated with the tranny after a little wiggling. We did have a slight issues as one of the alignment pins stayed in the bell house ear when the old engine came out, so we had to cut the new pin with a hacksaw as we didn't notice until after the tow truck was unhooked. It was easier to just cut it than it was to remove the engine. After that was done, it mated without incident.
Saturday 4/18/2009
We cleaned both the engine block and cylinder head surfaces with a soft die grinder to removed the old rust (thanks to the folks on oldihc.org for the tip) and also did the same to the intake manifold surfaces before putting the manifold back on. The heads went on without a problem, and the intake manifold was a breeze to put on. The exhaust manifolds were a little more difficult, but after some choice words and a few cuts on the hand, they were snug to the engine.
We bolted on the fuel pump next, and then timed the engine to cylinder number eight, without the use of a timing light. All we did was align the timing mark with zero degrees on the compression stroke, picked a post on the distributor cap, and started counting from there. My IHC V-304 rebuild manual that I bought was an excellent resource for this project!
The oil was changed, and a new oil filter was screwed on.
Sunday 4/19/2009
Today was spent putting on the thermostat housing (with a new 160 degree thermostat) which we picked up from Sanel Auto Parts. They didn't have a new gasket available for the housing, so Katherin (my girlfriend) cut a new gasket out of cork using the old one as a guide. The alternator bracket was hooked on and alternator was added. After some head scratching about the alternator and coil wiring, I referred to a diagram I drew that I used to build a new voltage regulator for the truck. (Back in 2007 I had to have the alternator rebuilt, and we discovered the old voltage regulator was bad. The guys at Auto Electric in Brentwood, NH, who also rebuilt the alternator, were able to help me build a replacement from few different pieces.) After everything was hooked up properly, we put the pulleys on the water pump and the crankshaft. The twin V-belts were run, and the carburetor was put onto the manifold. A good battery charge was done as well!
We sprayed a little bit of starting fluid into the carb and closed the choke. After a bit of a crank, the engine sputtered! I sprayed a little more ether, but left the choke open.....and she backfired right out of the carb! There was quite a flame, but I didn't lose my eyebrows. After that lesson, we did it once more. After the engine caught, I forgot that I had the fuel lines connected, and fuel started coming up into the lower filter....I noticed it but figured it wouldn't make it to the second filter before the carb.....boy was I wrong! About 10 seconds after it hit the first filter before the fuel pump, the second filter was full! I told Katherin to shut the engine down as I wasn't ready to have her run on her own...it was simply a test to make sure the truck would even fire!
Tomorrow will be spent putting the radiator in, adding engine coolant, and getting the throttle and choke cables hooked back up. We also have to splice some of the wires back together as I had to cut a few so the engine could get (they ran just above the radiator). After that's done we can spend he rest of the afternoon adjusting the carb for the truck and letting her spend some time running. Maybe she will even sneak a ride onto the road for a test.......
More to follow tomorrow!

Tuesday, April 14, 2009
FINALLY!!
Well the day has finally come.....Thurday, April 16th, 2009. The day the new engine will be put into the truck and fired up for the first time!
It only took me 1 1/2 years to get it done.....but now that the weather is good, and I'm not injured, it should be all set.
I went out Monday and checked the new engine...it was a little stuck, but nothing some oil in the cylinders and a little elbow grease couldn't fix....so it's at least rotating now. Changed out the intake manifold to the old engine's to get rid of all the emissions bullshit. Now I just have to get the two exhaust manifolds off (which requires cutting a bolt or two as the heads are rounded), get the wrecker on the old engine, take it out (removing the clutch, flywheel, and mounting bracket), plop the parts onto the new engine, and mate her to the tranny. Hopefully it goes without a problem. Hopefully.
It only took me 1 1/2 years to get it done.....but now that the weather is good, and I'm not injured, it should be all set.
I went out Monday and checked the new engine...it was a little stuck, but nothing some oil in the cylinders and a little elbow grease couldn't fix....so it's at least rotating now. Changed out the intake manifold to the old engine's to get rid of all the emissions bullshit. Now I just have to get the two exhaust manifolds off (which requires cutting a bolt or two as the heads are rounded), get the wrecker on the old engine, take it out (removing the clutch, flywheel, and mounting bracket), plop the parts onto the new engine, and mate her to the tranny. Hopefully it goes without a problem. Hopefully.
Wednesday, January 7, 2009
What a Fall and Winter!
Hello Readers!
Sorry it's been a while since I've been posting, but there have been a few issues to keep me away lately. In October I was rushed to the hospital for acute appendicitis, and I was placed on work restriction for nine weeks following surgery.....so not only did I not make any money, I was unable to put any time into the truck....add that to a very soggy fall and a horrible winter so far, and I think things are self explanatory.
I don't know if any of you heard but NH (and New England in general) was hit with the worst ice storm in the history of the area on December 11th and 12th. There were lots of trees down, and unending power outages. (I had no power for five days, and I feel lucky since some went without for 12-15 days!) Fortunately, the truck was spared any damage from falling trees......not a single branch brushed her.....and I'm glad she's not parked at my new house because where she would have gone was full of a rather large tree limb when I woke up...not something I would want to find smashed into the body of the truck!
Well, hopefully this will be the year, finally. Now that the engine is 90% disassembled all we have to do is tear it out and toss in the new one.....hopefully as soon as the ground is dry from spring it'll get done and be back on the road once again!
Stay tuned folks, 2009 is gonna be a great year!
Sorry it's been a while since I've been posting, but there have been a few issues to keep me away lately. In October I was rushed to the hospital for acute appendicitis, and I was placed on work restriction for nine weeks following surgery.....so not only did I not make any money, I was unable to put any time into the truck....add that to a very soggy fall and a horrible winter so far, and I think things are self explanatory.
I don't know if any of you heard but NH (and New England in general) was hit with the worst ice storm in the history of the area on December 11th and 12th. There were lots of trees down, and unending power outages. (I had no power for five days, and I feel lucky since some went without for 12-15 days!) Fortunately, the truck was spared any damage from falling trees......not a single branch brushed her.....and I'm glad she's not parked at my new house because where she would have gone was full of a rather large tree limb when I woke up...not something I would want to find smashed into the body of the truck!
Well, hopefully this will be the year, finally. Now that the engine is 90% disassembled all we have to do is tear it out and toss in the new one.....hopefully as soon as the ground is dry from spring it'll get done and be back on the road once again!
Stay tuned folks, 2009 is gonna be a great year!
Tuesday, August 26, 2008
Photo Post
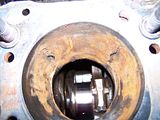
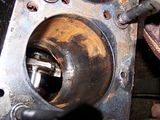
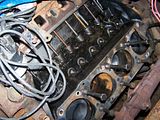
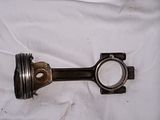
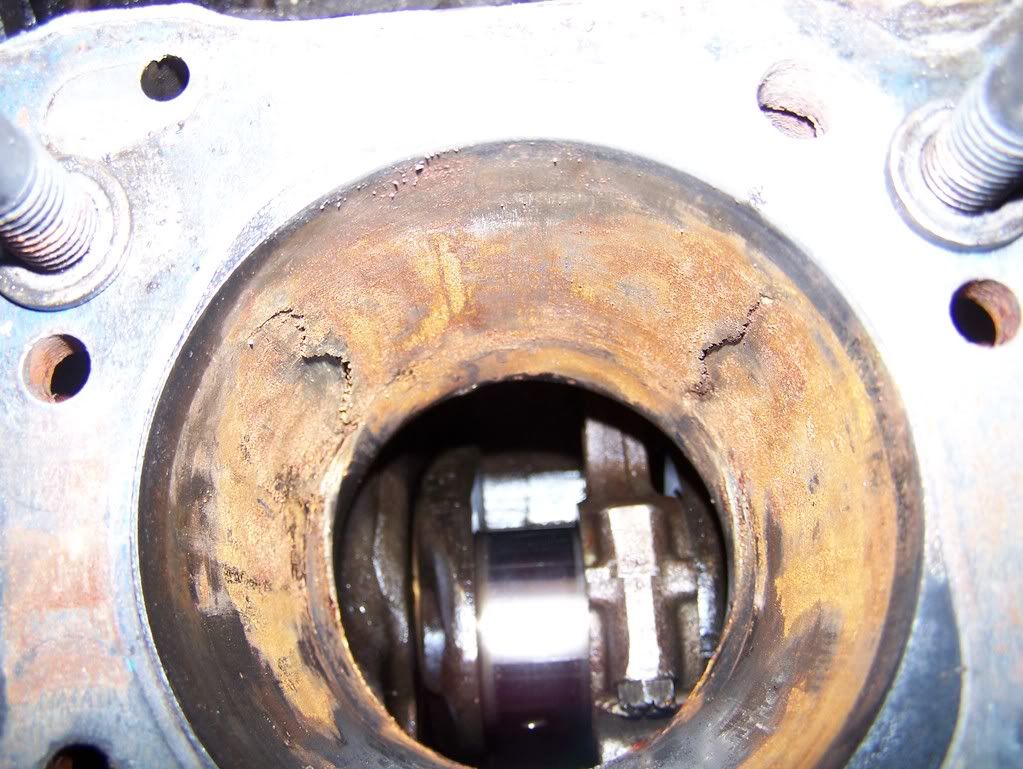
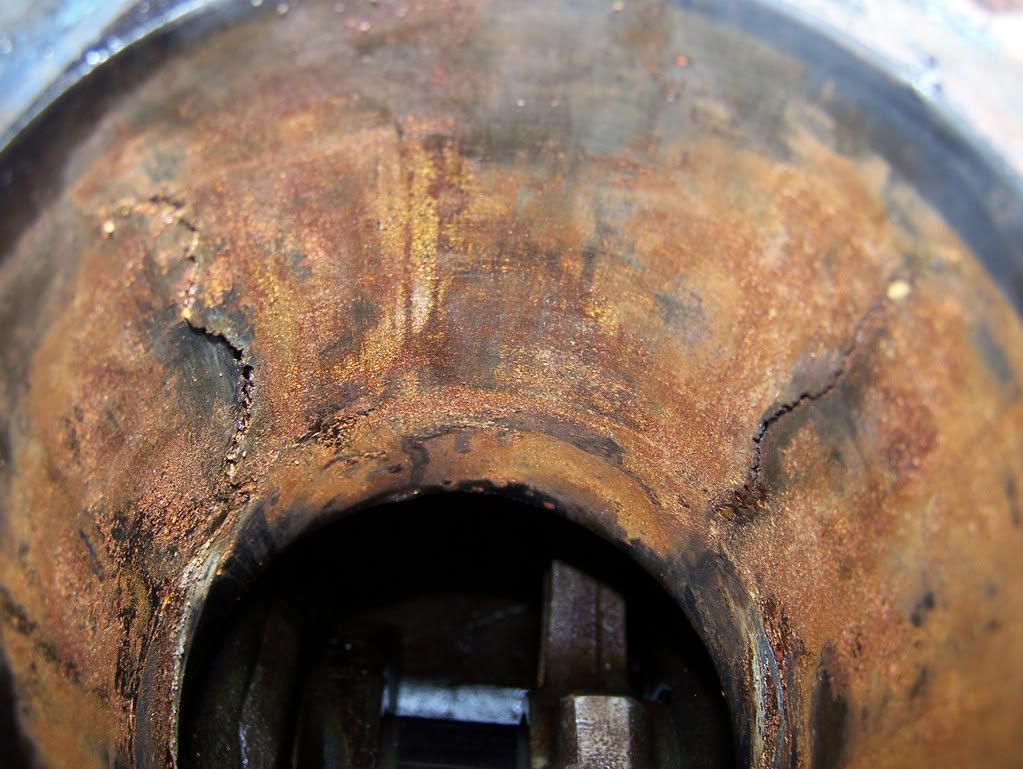
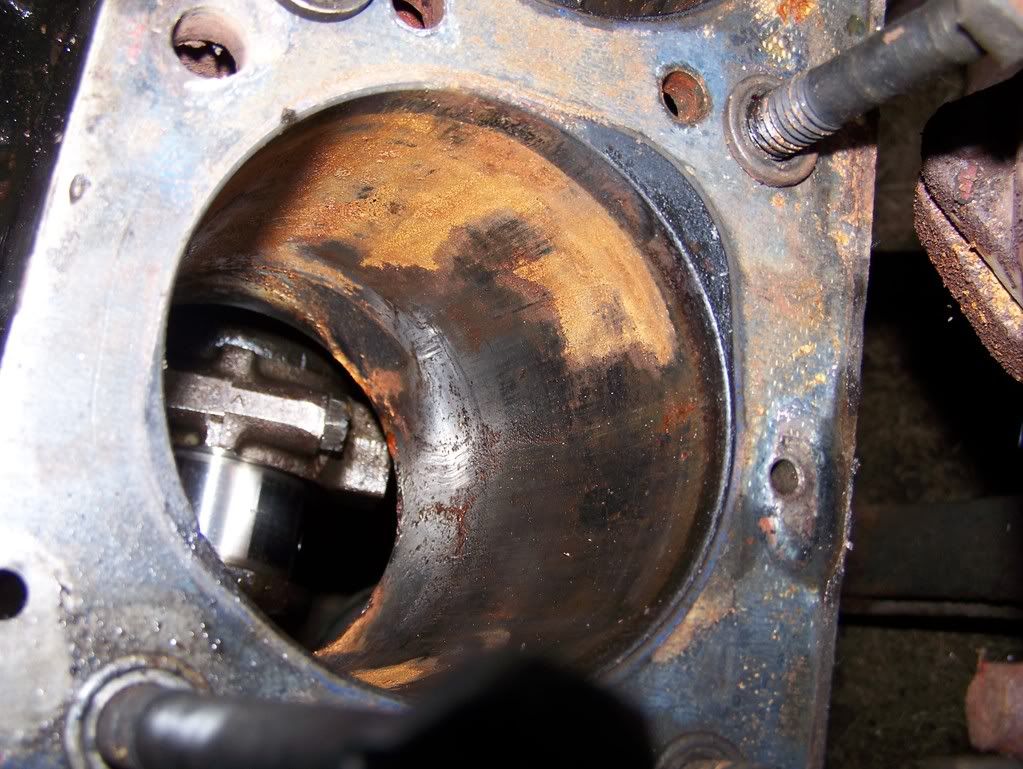
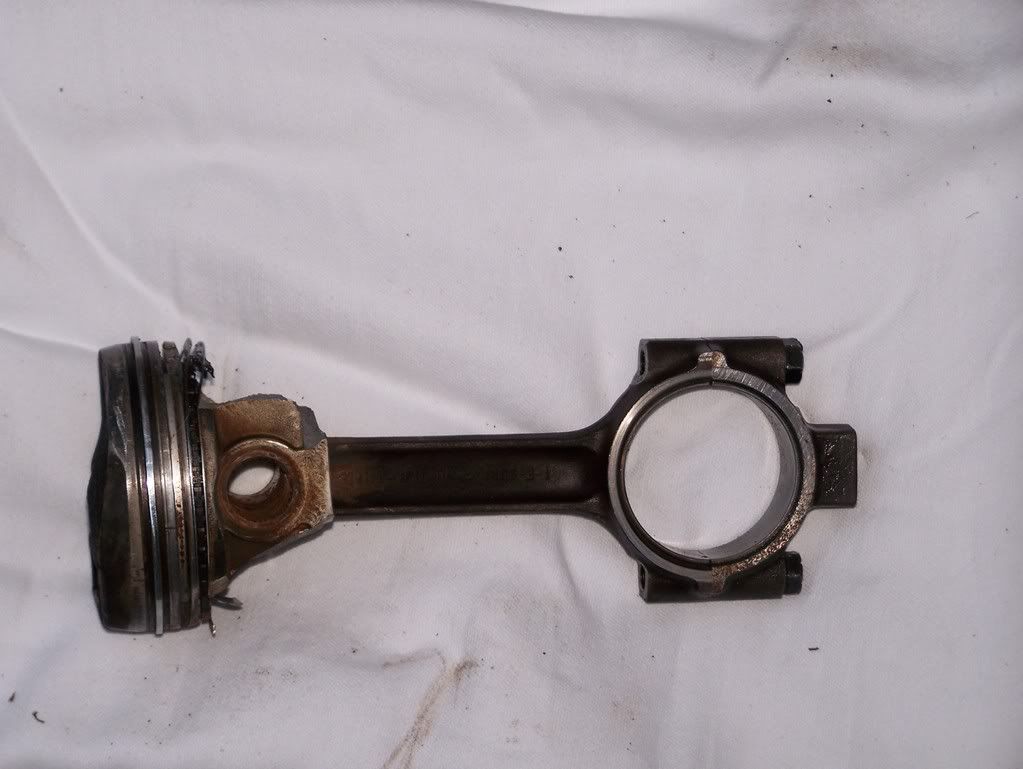
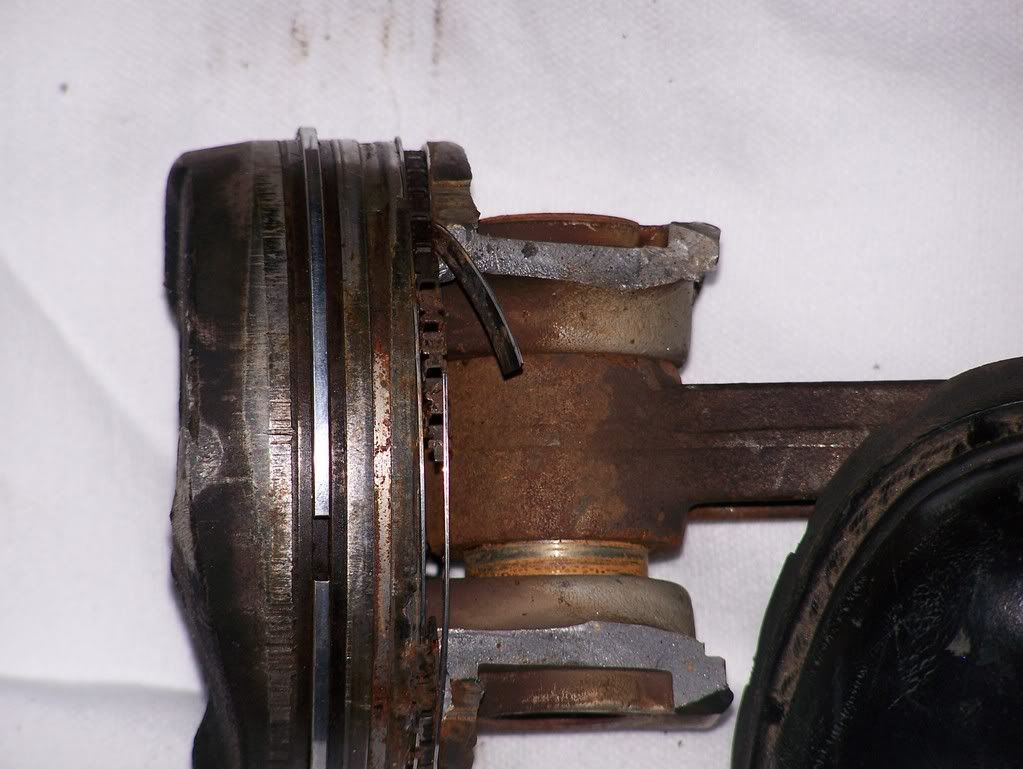
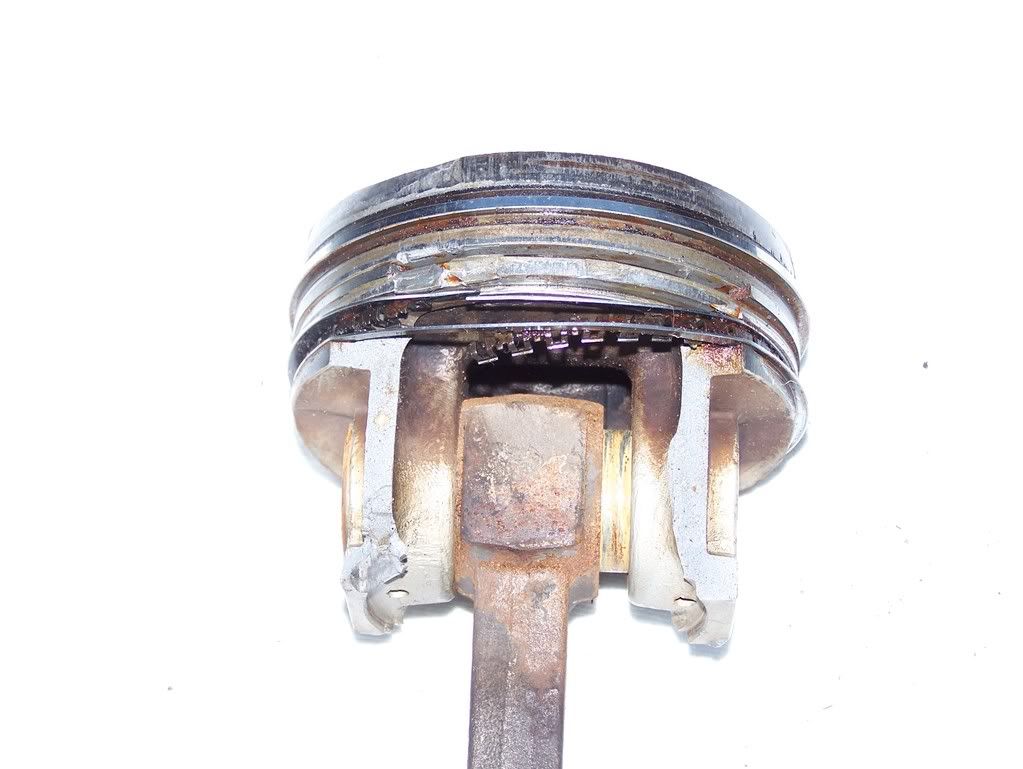
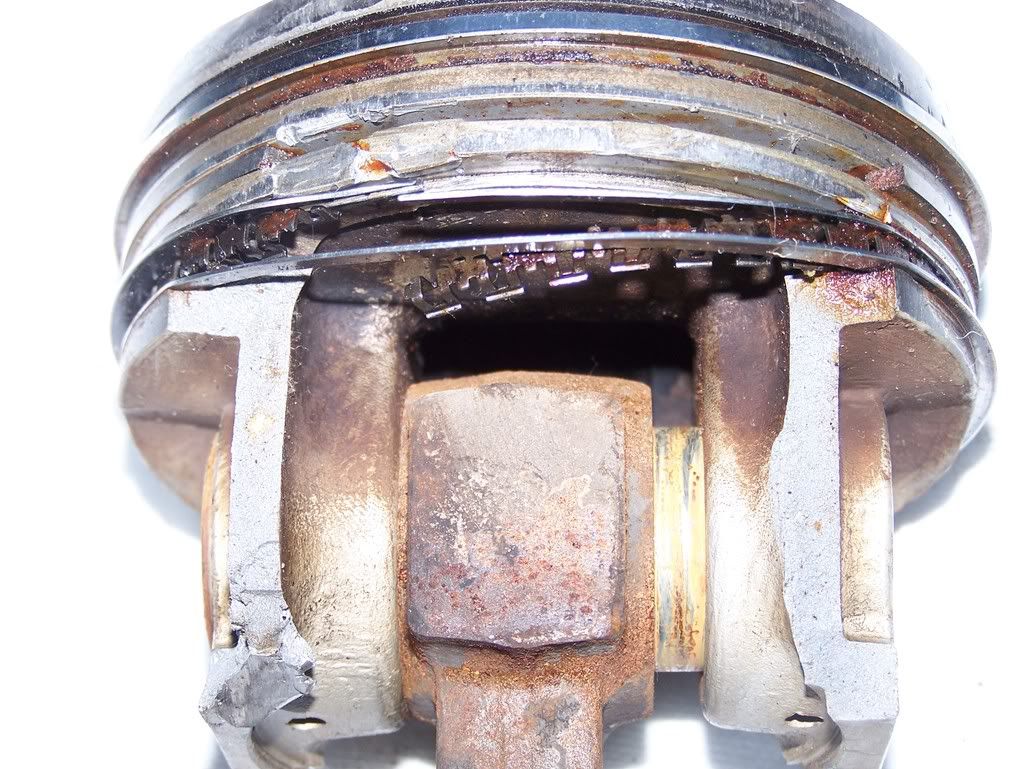
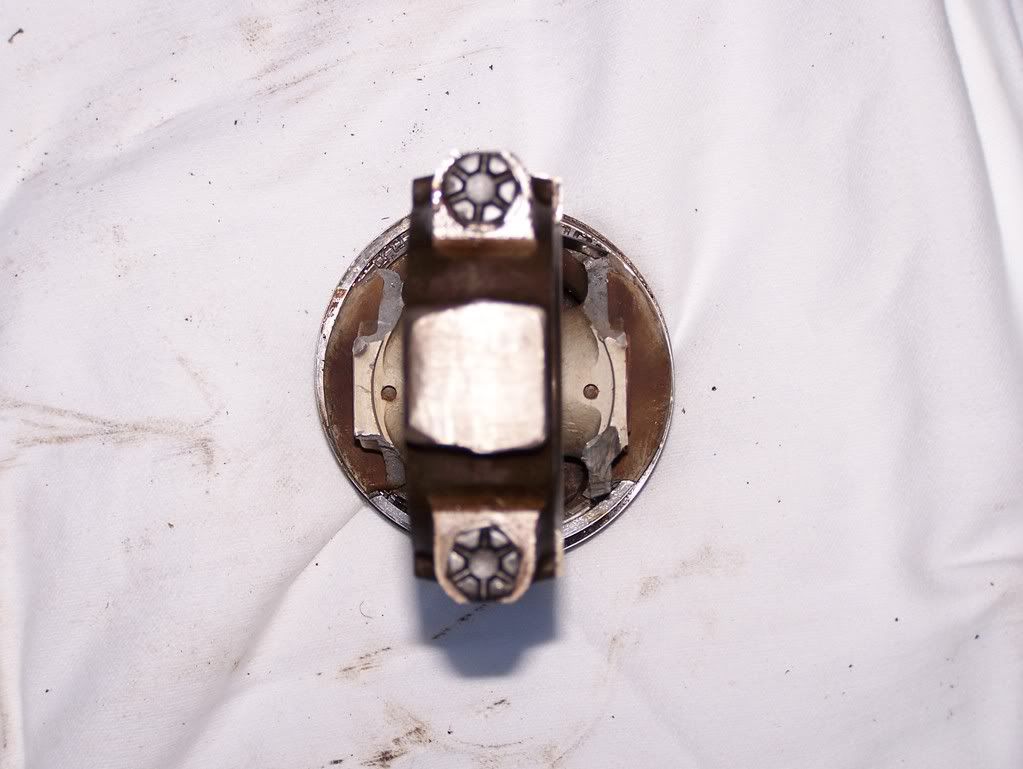
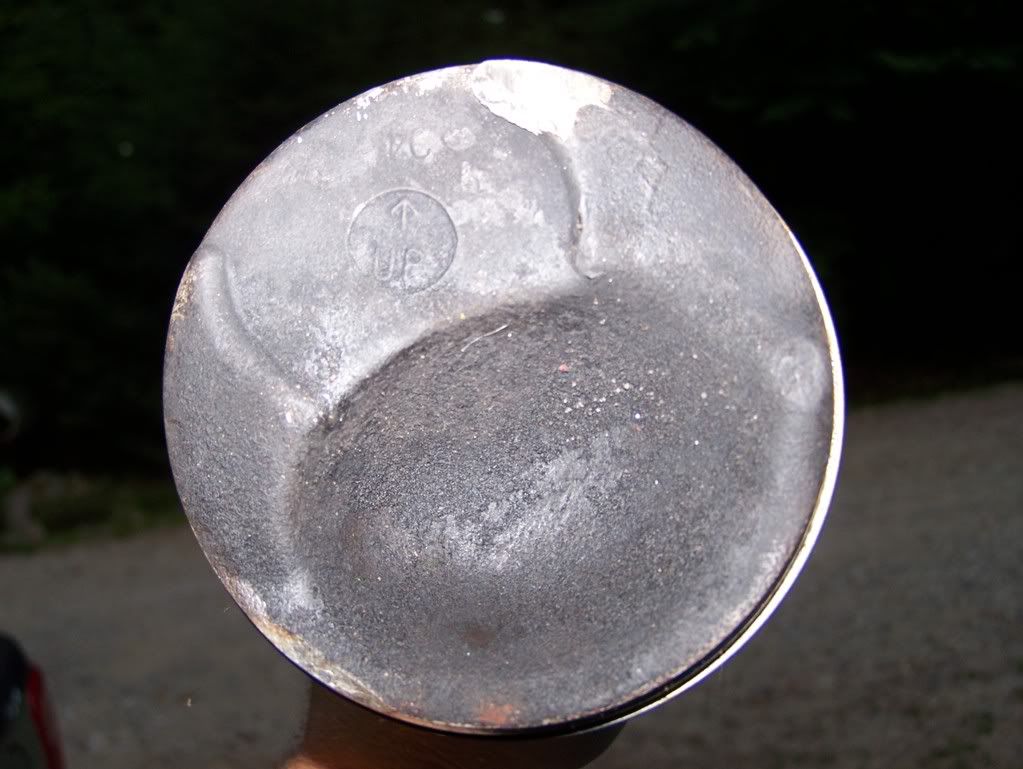
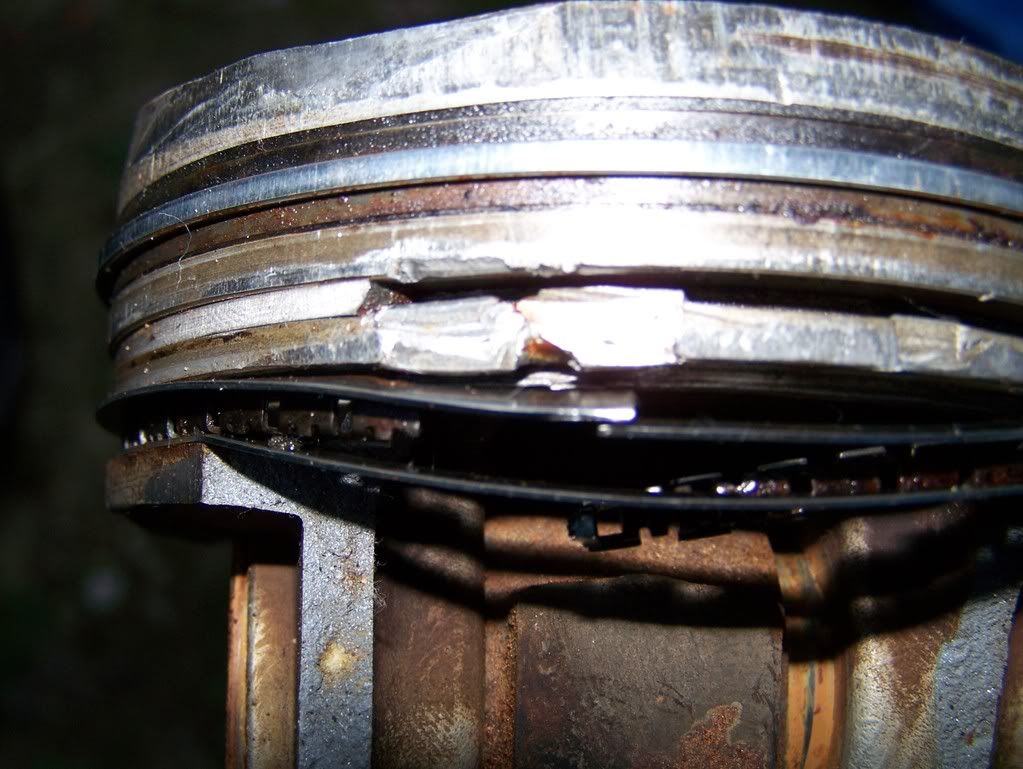
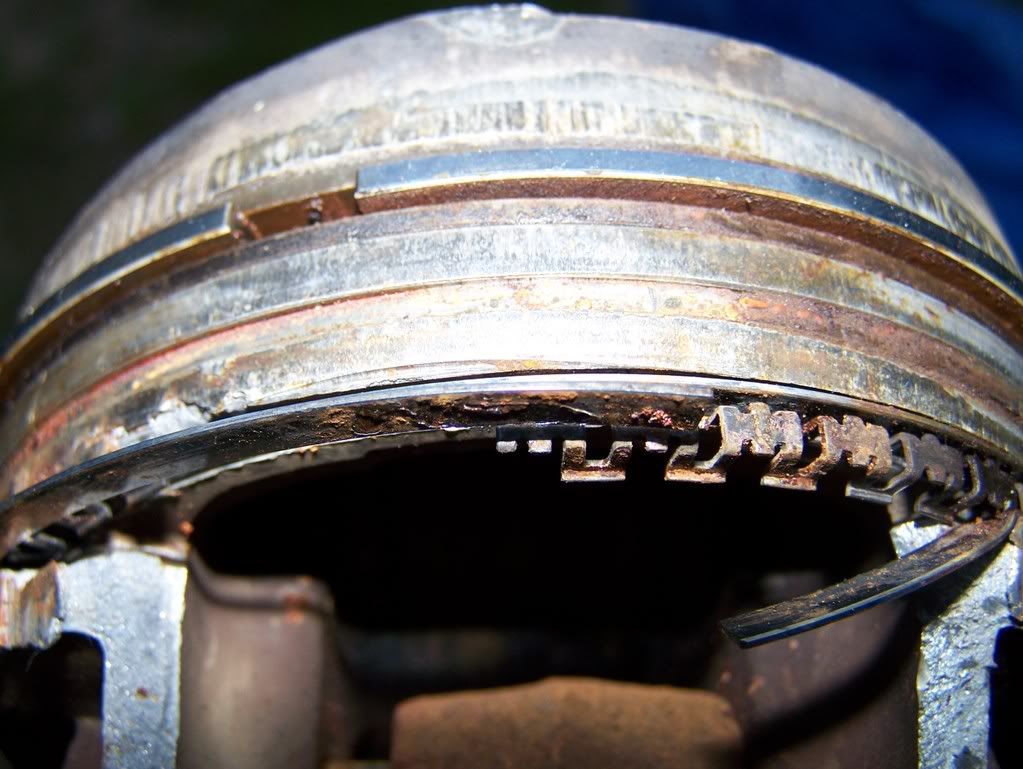
Here are the pictures of the damage from the engine work I've done.
Clicky thumbnails to photobucket for larger pictures.

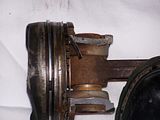
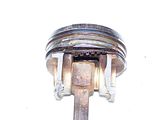
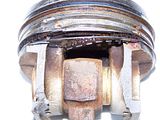
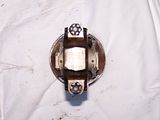
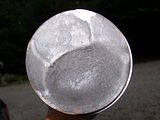
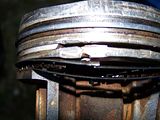
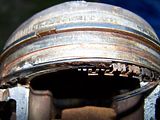
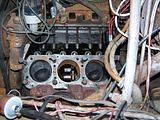
Clicky thumbnails to photobucket for larger pictures.
Friday, August 22, 2008
Bad News
Well after enlisting the help of my father last night we decided that the best course of action was to pull the oil pan off and take a look into the lower end of the engine. After draining what oil was in the engine and fiddling with the oil pan bolts for 45 minutes (alot of them are in tight spots) we were able to get the pan down and take a look inside.
Remember when I was talking about the bits of metal in the bottom of the pan....well I found out what they were....and there were alot of them. They were piston parts....never a good sign in the bottom of an oil pan in a broken engine. Looking into the bottom of the engine, most of the cylinders looked like they were in good shape....all except one. The one that had the crooked piston...there was quite a bit of rust runs down the side and into the crankcase!
My dad and I decided that we should remove the piston and see if the cylinder was damaged. We took the cap bolts off the I popped the piston out (which I thought was WAY too easy), and as soon as I climbed out from underneath and got to the offening cylinder I knew I was done for....the piston had nothing left except for the head and connecting pin...the sides/skirt was ALL gone. And I found where the coolant came into the engine....when the piston had broke (or if it was previously broken it had been rubbing), it wore two giant cracks into the sides of the cylinders...guess the water pressure was finally enough to do it in when I was climbing that hill back in October!
So here it stands....the old engine is pretty much trash for now (well, at least the block)and unless I can find some way to have it fixed (maybe a new bore and a sleeve)it will never power another vehicle....it'll probably become a coffee table in my house someday :).
So now I'm gonna take the rest of the engine apart down to the block alone, and take the thing out. Gotta grab a bunch of parts for the spare engine off the old one, and hopefully slap it right in...we'll see how that goes and when I can get it done.
Take care!
Josh
70-C1
Remember when I was talking about the bits of metal in the bottom of the pan....well I found out what they were....and there were alot of them. They were piston parts....never a good sign in the bottom of an oil pan in a broken engine. Looking into the bottom of the engine, most of the cylinders looked like they were in good shape....all except one. The one that had the crooked piston...there was quite a bit of rust runs down the side and into the crankcase!
My dad and I decided that we should remove the piston and see if the cylinder was damaged. We took the cap bolts off the I popped the piston out (which I thought was WAY too easy), and as soon as I climbed out from underneath and got to the offening cylinder I knew I was done for....the piston had nothing left except for the head and connecting pin...the sides/skirt was ALL gone. And I found where the coolant came into the engine....when the piston had broke (or if it was previously broken it had been rubbing), it wore two giant cracks into the sides of the cylinders...guess the water pressure was finally enough to do it in when I was climbing that hill back in October!
So here it stands....the old engine is pretty much trash for now (well, at least the block)and unless I can find some way to have it fixed (maybe a new bore and a sleeve)it will never power another vehicle....it'll probably become a coffee table in my house someday :).
So now I'm gonna take the rest of the engine apart down to the block alone, and take the thing out. Gotta grab a bunch of parts for the spare engine off the old one, and hopefully slap it right in...we'll see how that goes and when I can get it done.
Take care!
Josh
70-C1
Thursday, August 21, 2008
Wow been quite a while!
Well it's been a while since I've been here....life has been way too busy to do much of anything other than work! I've been trying to make some extra money to pay for college (I'm off to nursing school this fall!) so I've been spending the majority of my time at work, and the truck has fallen out of the picture for the most part. I've still got that spare engine, and as of last week the only thing that's changed since it broke was that I took the majority of the front end apart. I've got the hood, grille, and radiator off, and they've been sitting there for the last month with nothing done.
Soooooooo....yesterday my partner at work somehow motivated me to do some work on the truck that evening. I don't know how she did, but she did and I went right home, grabbed the tools, and started getting greasy. I figured last night I'd would try and get the driver's side cylinder head off and check the gasket....I figured that was more than likely the location of the problem I had because I had alot of coolant in those cylinders. I got the carb off, took off the intake manifold, and the exhaust manifold without a problem.....thank god for the Manchester Fire Department as every bolt on that engine was slopping wet with anti-sieze....I didn't even snap an exhaust bolt which I was afraid of doing! Got all that cleared out, and took off the tappet cover to see if there may have been an issue in there.....and of course there wasn't...it was clean. Got the valve train off and pulled the lifter rods (set aside in a box in order and labeled, of course) without a problem. Then the head.....got all 10 bolts off no problem, and broke the seal on the head.....I pulled the head off and carried over to the tarp to do a quick inspection. I peeled the old gasket off and looked at it....and found nothing wrong with it. So I ruled out that problem...I still have to pull the passenger side, which is this evening's project, so maybe that one is blown..we'll see.
But then while I was looking at the head I noticed the second cylinder in from the front......the head was different right there...it was black, oily, and the exhaust valve was black unlike the rest which were red and clean. "Huh" I said to myself. Looking at the piston in that cylinder, I noticed there was a clean spot on the very top....something that shouldn't be there in a cylinder like that. I grabbed my breaker bar and large socket and put it onto the crank....and turned....and when that piston was comming up it went off kilter and jammed...I swore up and down so much my mom would have beat my A$$ and washed my mouth with soap and pepper!!
I guess that explains alot though....the truck always smoked, and it always had a tap at idle. I thought it was just a valve issue, or that the cams were going...but I guess not....I was a piston! And all that crap in the bottom of the pan....I'm guessing that's parts of the piston...not parts of the cams like I first thought.
Tonight will be the determining factor in where things go from here....I'm gonna pull that other head and see what those cylinders look like....we'll see what I find. I'm hoping that once I get the other head off and I pull the oil pan I'll figure out what that stuff in the bottom is, and shine and light up into the engine with the bad piston and see what the damage is....hopefully the rod didn't go through the block and it really is just a bad head gasket on the passenger's side! I don't think the rod would have gone through because the piston still goes through it's full travel with no problem except that sometimes it goes crooked....and when the engine was turned over during the winter a few times I didn't hear any funky noises.....I guess only taking it apart will tell!!
Somehow all that coolant got into the engine......and I need to find out why!
(I'll try and put some pictures up tonight!)
Josh
70-C1
Soooooooo....yesterday my partner at work somehow motivated me to do some work on the truck that evening. I don't know how she did, but she did and I went right home, grabbed the tools, and started getting greasy. I figured last night I'd would try and get the driver's side cylinder head off and check the gasket....I figured that was more than likely the location of the problem I had because I had alot of coolant in those cylinders. I got the carb off, took off the intake manifold, and the exhaust manifold without a problem.....thank god for the Manchester Fire Department as every bolt on that engine was slopping wet with anti-sieze....I didn't even snap an exhaust bolt which I was afraid of doing! Got all that cleared out, and took off the tappet cover to see if there may have been an issue in there.....and of course there wasn't...it was clean. Got the valve train off and pulled the lifter rods (set aside in a box in order and labeled, of course) without a problem. Then the head.....got all 10 bolts off no problem, and broke the seal on the head.....I pulled the head off and carried over to the tarp to do a quick inspection. I peeled the old gasket off and looked at it....and found nothing wrong with it. So I ruled out that problem...I still have to pull the passenger side, which is this evening's project, so maybe that one is blown..we'll see.
But then while I was looking at the head I noticed the second cylinder in from the front......the head was different right there...it was black, oily, and the exhaust valve was black unlike the rest which were red and clean. "Huh" I said to myself. Looking at the piston in that cylinder, I noticed there was a clean spot on the very top....something that shouldn't be there in a cylinder like that. I grabbed my breaker bar and large socket and put it onto the crank....and turned....and when that piston was comming up it went off kilter and jammed...I swore up and down so much my mom would have beat my A$$ and washed my mouth with soap and pepper!!
I guess that explains alot though....the truck always smoked, and it always had a tap at idle. I thought it was just a valve issue, or that the cams were going...but I guess not....I was a piston! And all that crap in the bottom of the pan....I'm guessing that's parts of the piston...not parts of the cams like I first thought.
Tonight will be the determining factor in where things go from here....I'm gonna pull that other head and see what those cylinders look like....we'll see what I find. I'm hoping that once I get the other head off and I pull the oil pan I'll figure out what that stuff in the bottom is, and shine and light up into the engine with the bad piston and see what the damage is....hopefully the rod didn't go through the block and it really is just a bad head gasket on the passenger's side! I don't think the rod would have gone through because the piston still goes through it's full travel with no problem except that sometimes it goes crooked....and when the engine was turned over during the winter a few times I didn't hear any funky noises.....I guess only taking it apart will tell!!
Somehow all that coolant got into the engine......and I need to find out why!
(I'll try and put some pictures up tonight!)
Josh
70-C1
Subscribe to:
Posts (Atom)

